JointBooklet · jointbooklet.com
Shoulder Hemiarthroplasty Starter Exercise Guide
A short starting program — 8 exercises drawn from the full 41-exercise program. These are the movements most people begin with.
Before you begin. This is general guidance, not a personal prescription. If your surgeon or therapist has given you a different program or different limits, follow theirs.
1. Pendulum Swings
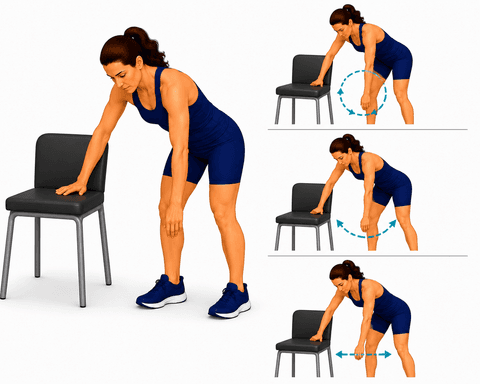
What it helps: Coaxes the shoulder through gentle motion with the muscles relaxed — keeping the joint moving and easing stiffness when active movement is still uncomfortable.
How often: 2–3 sets of 1–2 min, a few times a day.
- Lean forward and support your good arm on a table or chair, letting the sore arm hang down relaxed.
- Let the arm swing gently — small circles, then forward-and-back and side-to-side — using a gentle sway of your body, not the shoulder muscles.
- Keep it loose and pain-free, like a relaxed pendulum.
Tip: The movement comes from rocking your body, not from working the shoulder.
2. Cane-Assisted Shoulder Flexion
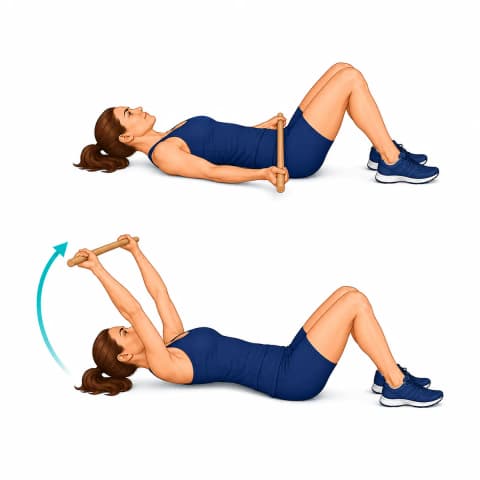
What it helps: Keeps the shoulder moving while the repaired tendon is protected from doing any work. Movement in these early weeks is what prevents the stiffness that is otherwise the hardest part of the recovery to undo.
How often: 2–3 sets of 10–15, daily.
- Lie on your back holding a broom handle, walking stick or length of dowel across your body with both hands, palms up.
- Keep the operated arm completely relaxed — let it be carried.
- Use the good arm to push the stick, raising both arms up over your chest and toward your head.
- Go only as far as is comfortable and as far as your surgeon has allowed, then lower slowly using the good arm to control it.
Tip: The operated arm is a passenger. If its muscles are working, the exercise is not doing its job.
3. Cane-Assisted External Rotation
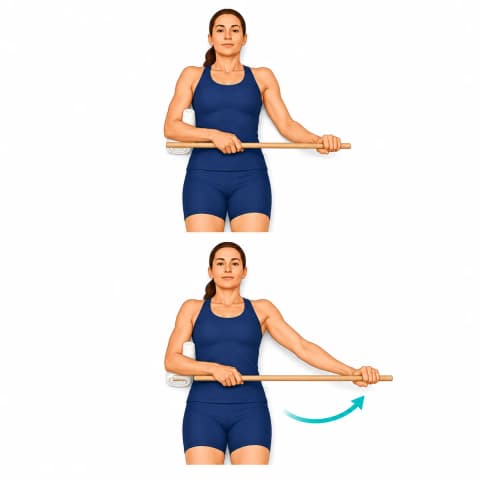
What it helps: Preserves the outward rotation of the shoulder, which is the movement most commonly lost after a rotator cuff repair and the hardest to regain once it has gone. Doing it passively means the repair is not loaded.
How often: 2–3 sets of 10–15, daily.
- Lie on your back, sit, or stand with the operated elbow tucked against your side, bent to a right angle. A rolled towel between elbow and body helps.
- Hold a stick across your body with both hands.
- Keeping the elbow against your side, use the good arm to push the stick so the operated forearm rotates outward, away from your stomach.
- Go only to the limit your surgeon has set, hold briefly, then let the good arm bring it back.
Tip: The elbow stays glued to your side. Letting it drift away from the body turns this into a different, less useful movement.
4. Scapular Retraction
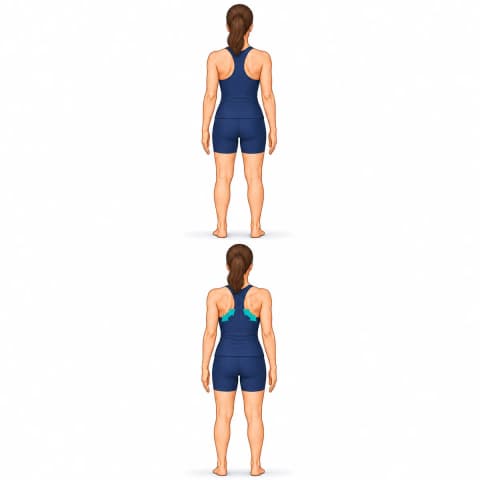
What it helps: Keeps the muscles that position the shoulder blade working while the shoulder joint itself is resting. Those muscles set the platform the whole shoulder moves on, and they weaken quickly in a sling, which makes the later recovery harder than it needs to be.
How often: 2–3 sets of hold 5s, 10 times, daily.
- Sit or stand tall with your arms resting at your sides.
- Draw both shoulder blades gently back and down, as though squeezing them toward each other.
- Keep the movement small and slow. Your arms should not move at all.
- Hold briefly, then relax completely.
Tip: Small is correct. This is a squeeze between the shoulder blades, not a shrug and not an arm movement.
5. Elbow Range of Motion
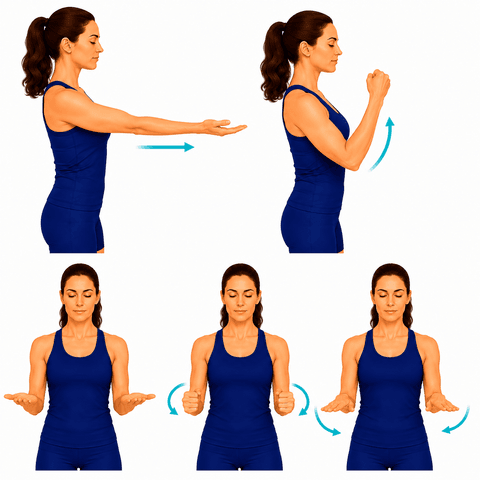
What it helps: Keeps the elbow and forearm moving through their full range — preserving the bend, straighten, and rotation you use for everyday tasks.
How often: 2–3 sets of 10 each, daily.
- Bend the elbow to bring your hand toward your shoulder, then slowly straighten it all the way.
- With the elbow tucked at your side and bent 90°, turn your palm up, then down.
- Move smoothly through comfortable range; don't force the ends.
Tip: Keep the upper arm still — the movement is at the elbow and forearm.
6. Walking Program
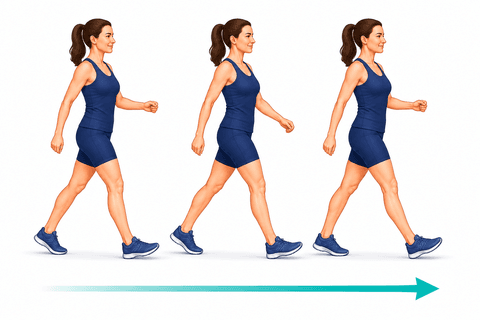
What it helps: Comfortable, frequent walking keeps the joints loose, builds your stamina, and rebuilds confidence on your feet. Little and often beats long and tiring.
How often: throughout the day.
- Take short walks at a comfortable pace.
- Increase your distance gradually as you feel able.
Tip: Use your assistive device as directed.
7. Grip Strengthening
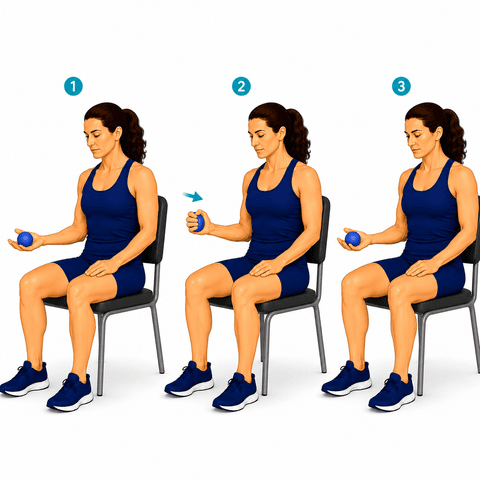
What it helps: Builds the grip and forearm strength behind almost every hand task — and supports the tendons at the elbow that grip relies on.
How often: 2–3 sets of 10–15, most days.
- Hold a soft ball or therapy putty in your hand.
- Squeeze firmly and hold a few seconds, then relax fully.
- Work through comfortable effort; stop short of sharp pain.
Tip: Full squeeze, full relax — both matter.
8. Arm Nerve Glides
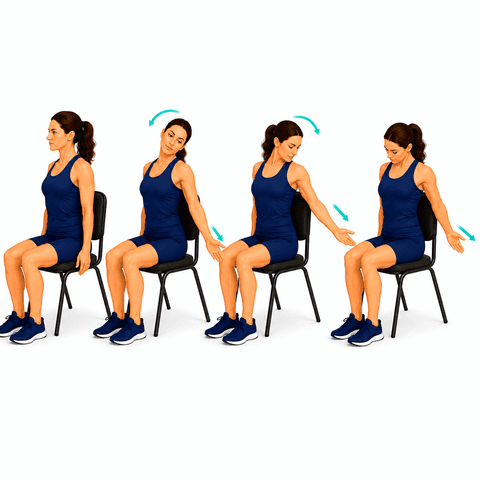
What it helps: Helps an irritated neck nerve glide freely down the arm, which can ease arm pain, tingling, or numbness. Gentle, repeated motion — never forced.
How often: 2–3 times sets of 10–15 slow glides, daily.
- Sit or stand tall. Start with the affected arm out to the side, elbow bent, palm up.
- Slowly straighten the elbow and ease the arm out while gently tilting your head AWAY — then return as you tilt the head back toward that side.
- Move smoothly in and out of the range, like flossing — never holding at the end or pushing into symptoms.
Tip: Gentle is the rule — ease back the moment it provokes sharp or shooting arm symptoms.
See the complete 41-exercise program, phase by phase.
What to expect in recovery
The full recovery guide for this procedure: Partial Shoulder Replacement recovery.
Recovery reading
Browse all exercise guides · Condition guides · Recovery education library
Are you a clinician? See how orthopedic practices use JointBooklet.
Are you a clinician? See how orthopedic practices use JointBooklet.
These are general exercise guides, not a personal prescription. The repetitions and frequency shown are what's commonly used — your own surgeon or therapist may advise something different, and their guidance comes first.