Flat Feet Exercise Guide

A phase-by-phase exercise program used in recovery for flat feet. Each movement includes what it's working on and how it's typically performed. Your own surgeon's or therapist's guidance always comes first.

Phase 1

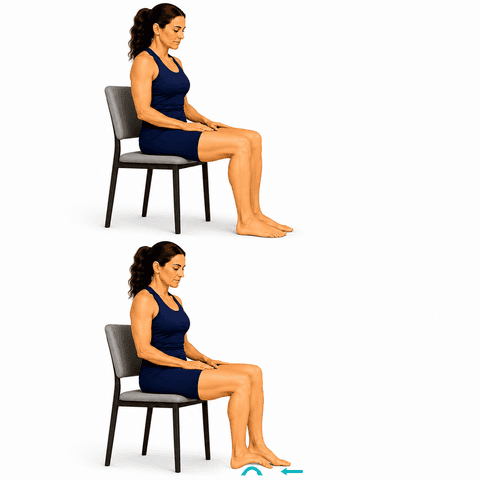
Short Foot (Arch Doming)

Short Foot (Arch Doming) exercise illustration

Strengthens the small muscles that support and lift the arch of the foot.

What it helps: Strengthens the small muscles inside the foot that support and lift the arch — the foundation of a stable, well-supported foot for standing and walking.

  1. Sit or stand with the foot flat. Without curling your toes, gently draw the ball of the foot back toward the heel so the arch lifts and shortens.
  2. Hold the gentle arch lift, then relax.
  3. Keep the toes long and relaxed — the work is in the arch, not the toes.

Tips:

  • It's a small, subtle movement — the arch domes up a little.
  • Keep the toes flat and relaxed; don't scrunch them.

Commonly done as 2–3 sets of Hold 5–10 sec ×8–10, daily.

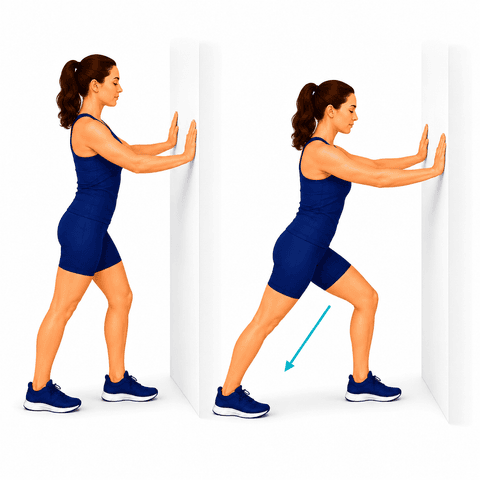
Calf Stretch

Calf Stretch exercise illustration

Keeps the calf and Achilles flexible, easing tension on the arch.

What it helps: Keeps the calf and Achilles supple, easing tension through the ankle and the arch of the foot.

  1. Stand facing a wall, hands on the wall, surgical leg back.
  2. Keep the back knee straight and heel down, and lean forward until you feel a stretch in the calf.
  3. Then bend the back knee slightly to stretch a little lower.

Tips:

  • Keep the stretch gentle and steady — no bouncing.

Commonly done as 3 sets of 20–30 sec hold, daily.

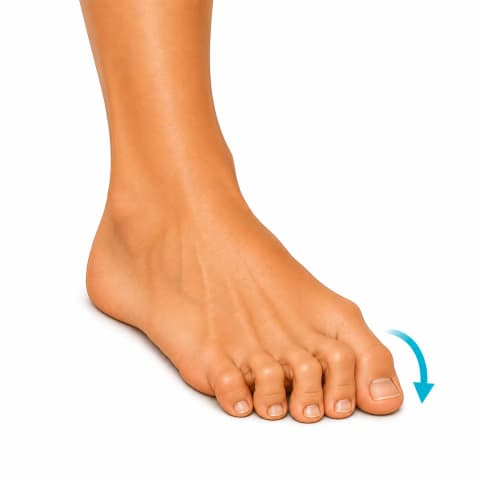
Toe Curls

Strengthens the small muscles under the foot.

What it helps: Strengthens the small muscles under the foot that support your arch and grip the ground.

  1. Seated with your foot flat, curl your toes downward as if gripping the floor.
  2. Hold briefly, then relax.

Tips:

  • Keep the motion gentle and controlled.

Commonly done as 2 sets of 10-15, daily.

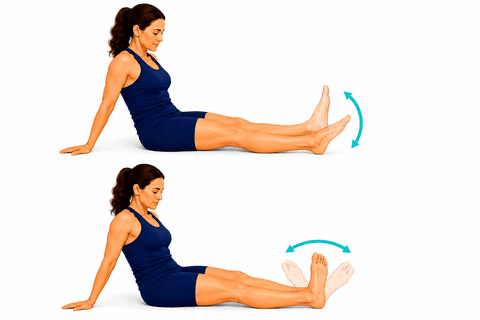
Gentle Ankle Range of Motion

Gentle Ankle Range of Motion exercise illustration

Keeps the ankle moving comfortably to restore gentle motion.

What it helps: Eases motion back into the ankle so it stays supple, within the limits your surgeon sets.

  1. Seated, slowly point your foot down and bring it back toward neutral.
  2. Gently move the foot side to side.

Tips:

  • Stay within a comfortable, pain-free range — avoid forcing the foot.
  • Your care team can guide how much ankle motion is right for your recovery.

Commonly done as 2-3 sets of 10, as directed.

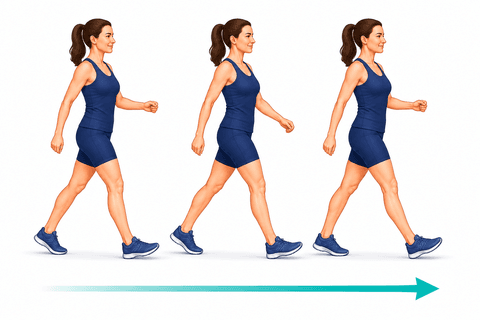
Walking Program

Walking Program exercise illustration

Short, frequent walks build endurance and confidence.

What it helps: Comfortable, frequent walking keeps the joints loose, builds your stamina, and rebuilds confidence on your feet. Little and often beats long and tiring.

  1. Take short walks at a comfortable pace.
  2. Increase your distance gradually as you feel able.

Tips:

  • Use your assistive device as directed.

Commonly done throughout the day.

Phase 2

Short Foot (Arch Doming)

Short Foot (Arch Doming) exercise illustration

Strengthens the small muscles that support and lift the arch of the foot.

What it helps: Strengthens the small muscles inside the foot that support and lift the arch — the foundation of a stable, well-supported foot for standing and walking.

  1. Sit or stand with the foot flat. Without curling your toes, gently draw the ball of the foot back toward the heel so the arch lifts and shortens.
  2. Hold the gentle arch lift, then relax.
  3. Keep the toes long and relaxed — the work is in the arch, not the toes.

Tips:

  • It's a small, subtle movement — the arch domes up a little.
  • Keep the toes flat and relaxed; don't scrunch them.

Commonly done as 2–3 sets of Hold 5–10 sec ×8–10, daily.

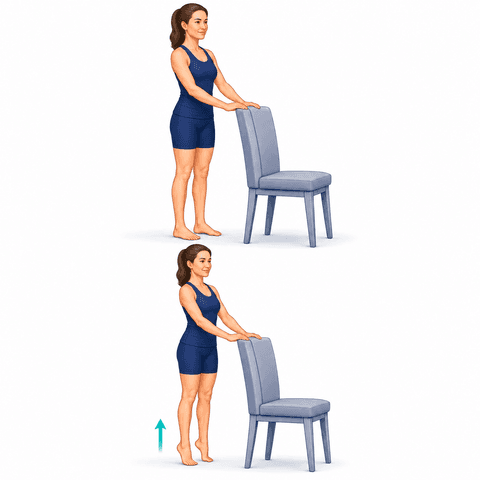
Heel Raises

Heel Raises exercise illustration

Strengthens the calf and improves balance.

What it helps: Strengthens the calf and steadies your balance, rebuilding the push-off that drives walking.

  1. Stand holding a counter.
  2. Rise up onto your toes.
  3. Lower slowly.

Commonly done as 2-3 sets of 10-15, once or twice a day.

Toe Curls

Strengthens the small muscles under the foot.

What it helps: Strengthens the small muscles under the foot that support your arch and grip the ground.

  1. Seated with your foot flat, curl your toes downward as if gripping the floor.
  2. Hold briefly, then relax.

Tips:

  • Keep the motion gentle and controlled.

Commonly done as 2 sets of 10-15, daily.

Resistance Band Ankle Eversion & Inversion
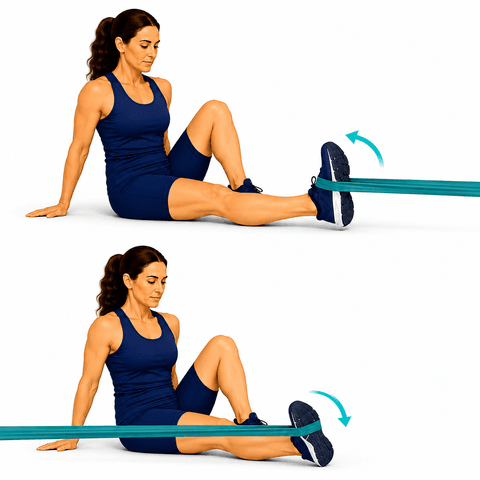
Resistance Band Ankle Eversion & Inversion exercise illustration

Strengthens the muscles on both sides of the ankle that turn the foot in and out.

What it helps: Strengthens the muscles that turn the foot in and out — the side-to-side stabilizers that protect the ankle from rolling and keep it steady on uneven ground.

  1. Sit with a resistance band looped around the foot. For eversion: anchor the band on the inner side and turn the sole outward against it, then return slowly.
  2. For inversion: anchor on the outer side and turn the sole inward against the band.
  3. Keep the lower leg still — the motion is at the ankle and foot.

Tips:

  • Controlled, light resistance.
  • Keep the shin still — only the foot turns.

Commonly done as 2–3 sets of 12–15 each, most days.

Walking Program

Walking Program exercise illustration

Short, frequent walks build endurance and confidence.

What it helps: Comfortable, frequent walking keeps the joints loose, builds your stamina, and rebuilds confidence on your feet. Little and often beats long and tiring.

  1. Take short walks at a comfortable pace.
  2. Increase your distance gradually as you feel able.

Tips:

  • Use your assistive device as directed.

Commonly done throughout the day.

Phase 3

Short Foot (Arch Doming)

Short Foot (Arch Doming) exercise illustration

Strengthens the small muscles that support and lift the arch of the foot.

What it helps: Strengthens the small muscles inside the foot that support and lift the arch — the foundation of a stable, well-supported foot for standing and walking.

  1. Sit or stand with the foot flat. Without curling your toes, gently draw the ball of the foot back toward the heel so the arch lifts and shortens.
  2. Hold the gentle arch lift, then relax.
  3. Keep the toes long and relaxed — the work is in the arch, not the toes.

Tips:

  • It's a small, subtle movement — the arch domes up a little.
  • Keep the toes flat and relaxed; don't scrunch them.

Commonly done as 2–3 sets of Hold 5–10 sec ×8–10, daily.

Heel Raises

Heel Raises exercise illustration

Strengthens the calf and improves balance.

What it helps: Strengthens the calf and steadies your balance, rebuilding the push-off that drives walking.

  1. Stand holding a counter.
  2. Rise up onto your toes.
  3. Lower slowly.

Commonly done as 2-3 sets of 10-15, once or twice a day.

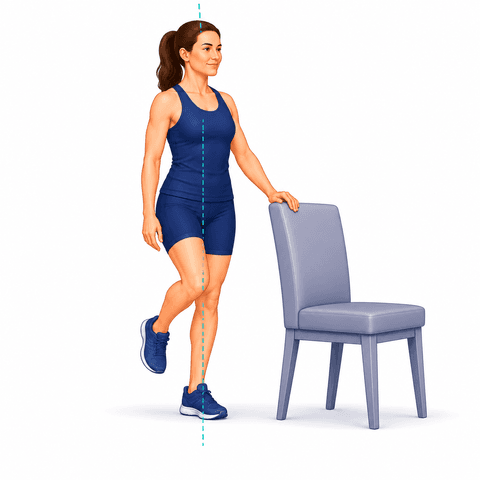
Single-Leg Balance

Single-Leg Balance exercise illustration

Improves balance and stability.

What it helps: Trains your hip and leg to stay steady when all your weight is on one side — which is most of walking. Better balance means a surer, more confident step.

  1. Stand near a counter for safety.
  2. Lift one foot and balance on the other leg.
  3. Hold as able.

Commonly done daily.

Resistance Band Ankle Eversion & Inversion

Resistance Band Ankle Eversion & Inversion exercise illustration

Strengthens the muscles on both sides of the ankle that turn the foot in and out.

What it helps: Strengthens the muscles that turn the foot in and out — the side-to-side stabilizers that protect the ankle from rolling and keep it steady on uneven ground.

  1. Sit with a resistance band looped around the foot. For eversion: anchor the band on the inner side and turn the sole outward against it, then return slowly.
  2. For inversion: anchor on the outer side and turn the sole inward against the band.
  3. Keep the lower leg still — the motion is at the ankle and foot.

Tips:

  • Controlled, light resistance.
  • Keep the shin still — only the foot turns.

Commonly done as 2–3 sets of 12–15 each, most days.

Calf Stretch

Calf Stretch exercise illustration

Keeps the calf and Achilles flexible, easing tension on the arch.

What it helps: Keeps the calf and Achilles supple, easing tension through the ankle and the arch of the foot.

  1. Stand facing a wall, hands on the wall, surgical leg back.
  2. Keep the back knee straight and heel down, and lean forward until you feel a stretch in the calf.
  3. Then bend the back knee slightly to stretch a little lower.

Tips:

  • Keep the stretch gentle and steady — no bouncing.

Commonly done as 3 sets of 20–30 sec hold, daily.

Phase 4

Short Foot (Arch Doming)

Short Foot (Arch Doming) exercise illustration

Strengthens the small muscles that support and lift the arch of the foot.

What it helps: Strengthens the small muscles inside the foot that support and lift the arch — the foundation of a stable, well-supported foot for standing and walking.

  1. Sit or stand with the foot flat. Without curling your toes, gently draw the ball of the foot back toward the heel so the arch lifts and shortens.
  2. Hold the gentle arch lift, then relax.
  3. Keep the toes long and relaxed — the work is in the arch, not the toes.

Tips:

  • It's a small, subtle movement — the arch domes up a little.
  • Keep the toes flat and relaxed; don't scrunch them.

Commonly done as 2–3 sets of Hold 5–10 sec ×8–10, daily.

Heel Raises

Heel Raises exercise illustration

Strengthens the calf and improves balance.

What it helps: Strengthens the calf and steadies your balance, rebuilding the push-off that drives walking.

  1. Stand holding a counter.
  2. Rise up onto your toes.
  3. Lower slowly.

Commonly done as 2-3 sets of 10-15, once or twice a day.

Single-Leg Balance

Single-Leg Balance exercise illustration

Improves balance and stability.

What it helps: Trains your hip and leg to stay steady when all your weight is on one side — which is most of walking. Better balance means a surer, more confident step.

  1. Stand near a counter for safety.
  2. Lift one foot and balance on the other leg.
  3. Hold as able.

Commonly done daily.

Resistance Band Ankle Eversion & Inversion

Resistance Band Ankle Eversion & Inversion exercise illustration

Strengthens the muscles on both sides of the ankle that turn the foot in and out.

What it helps: Strengthens the muscles that turn the foot in and out — the side-to-side stabilizers that protect the ankle from rolling and keep it steady on uneven ground.

  1. Sit with a resistance band looped around the foot. For eversion: anchor the band on the inner side and turn the sole outward against it, then return slowly.
  2. For inversion: anchor on the outer side and turn the sole inward against the band.
  3. Keep the lower leg still — the motion is at the ankle and foot.

Tips:

  • Controlled, light resistance.
  • Keep the shin still — only the foot turns.

Commonly done as 2–3 sets of 12–15 each, most days.

Low-Impact Recreational Activities

Low-Impact Recreational Activities exercise illustration

Enjoyable activities that protect your joint.

What it helps: Getting back to the activities you enjoy in ways that are kind to your joints — the whole point of building this strength.

Commonly done as you like.

Phase 5

Short Foot (Arch Doming)

Short Foot (Arch Doming) exercise illustration

Strengthens the small muscles that support and lift the arch of the foot.

What it helps: Strengthens the small muscles inside the foot that support and lift the arch — the foundation of a stable, well-supported foot for standing and walking.

  1. Sit or stand with the foot flat. Without curling your toes, gently draw the ball of the foot back toward the heel so the arch lifts and shortens.
  2. Hold the gentle arch lift, then relax.
  3. Keep the toes long and relaxed — the work is in the arch, not the toes.

Tips:

  • It's a small, subtle movement — the arch domes up a little.
  • Keep the toes flat and relaxed; don't scrunch them.

Commonly done as 2–3 sets of Hold 5–10 sec ×8–10, daily.

Heel Raises

Heel Raises exercise illustration

Strengthens the calf and improves balance.

What it helps: Strengthens the calf and steadies your balance, rebuilding the push-off that drives walking.

  1. Stand holding a counter.
  2. Rise up onto your toes.
  3. Lower slowly.

Commonly done as 2-3 sets of 10-15, once or twice a day.

Single-Leg Balance

Single-Leg Balance exercise illustration

Improves balance and stability.

What it helps: Trains your hip and leg to stay steady when all your weight is on one side — which is most of walking. Better balance means a surer, more confident step.

  1. Stand near a counter for safety.
  2. Lift one foot and balance on the other leg.
  3. Hold as able.

Commonly done daily.

Walking Program

Walking Program exercise illustration

Short, frequent walks build endurance and confidence.

What it helps: Comfortable, frequent walking keeps the joints loose, builds your stamina, and rebuilds confidence on your feet. Little and often beats long and tiring.

  1. Take short walks at a comfortable pace.
  2. Increase your distance gradually as you feel able.

Tips:

  • Use your assistive device as directed.

Commonly done throughout the day.

Low-Impact Recreational Activities

Low-Impact Recreational Activities exercise illustration

Enjoyable activities that protect your joint.

What it helps: Getting back to the activities you enjoy in ways that are kind to your joints — the whole point of building this strength.

Commonly done as you like.

About Flat Feet

What the condition is, how it's usually managed, and what to expect — read the Flat Feet guide.

Recovery reading

Browse all exercise guides · Condition guides · Recovery education library

These are general exercise guides, not a personal prescription. The repetitions and frequency shown are what's commonly used — your own surgeon or therapist may advise something different, and their guidance comes first.