Hip Avascular Necrosis Exercise Guide
A phase-by-phase exercise program used in recovery for hip avascular necrosis. Each movement includes what it's working on and how it's typically performed. Your own surgeon's or therapist's guidance always comes first.
Phase 1
Glute Squeezes

Gently re-engages the buttock muscles.
What it helps: Wakes up the glutes — the big muscles that steady and support your hip. Getting them firing again is the first step toward a hip that feels stronger and carries you with less strain on the joint.
- Lie or sit comfortably.
- Squeeze your buttock muscles together.
- Hold a few seconds, then relax.
Commonly done as 2-3 sets of 10, a few times a day.
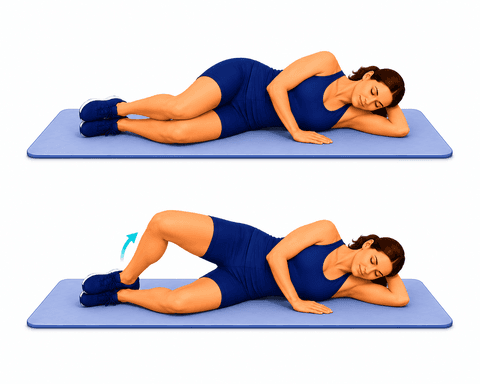
Clamshells

Strengthens the hip and glute muscles that stabilize the pelvis and spine.
What it helps: Targets the muscles on the side of the hip that keep your pelvis level when you walk. Strong here, your hip tracks smoothly and shares load more evenly — steadier, more comfortable steps.
- Lie on your side, knees bent and stacked.
- Keeping feet together and pelvis still, lift the top knee like a clamshell opening.
- Lower slowly.
Tips:
- Do not let your pelvis roll back.
- Feel it in the side of the hip.
Commonly done as 2 sets of 12–15 each side, daily.
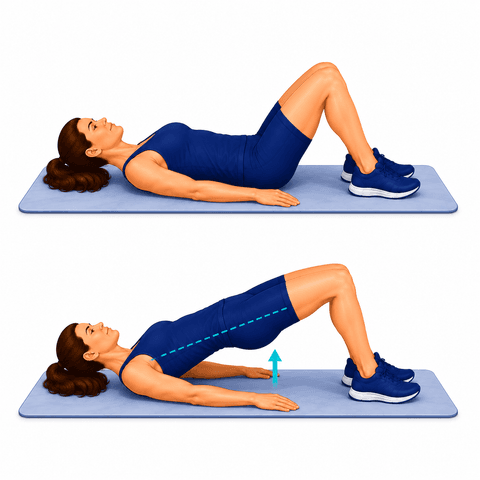
Bridges

Strengthens the glutes and core that support the low back.
What it helps: Builds the glutes and core together, giving your hips and low back a strong, stable base to move from — so the muscles do the work instead of the joints.
- Lie on your back, knees bent, feet flat.
- Brace your core and squeeze your glutes to lift your hips into a straight line.
- Lower slowly with control.
Tips:
- Keep your stomach gently braced — do not arch your back.
- Drive through the glutes, not the low back.
Commonly done as 2 sets of 10–15, daily.
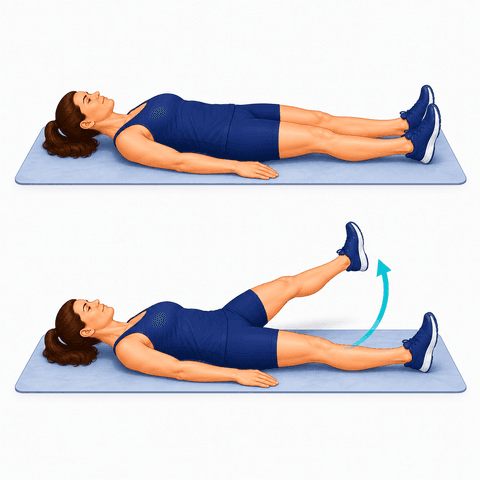
Hip Abduction & Adduction (Lying)

Works the muscles on the inside and outside of the hip and thigh.
What it helps: Gently strengthens the inner and outer hip muscles while lying down — easy, supported work that steadies the joint without loading it.
- Lie on your back with your legs straight.
- Slide your leg out to the side, keeping your toes pointed up.
- Slide it back to the center.
Tips:
- Keep your kneecap pointing toward the ceiling.
Commonly done as 20 repetitions, 1-2x daily.
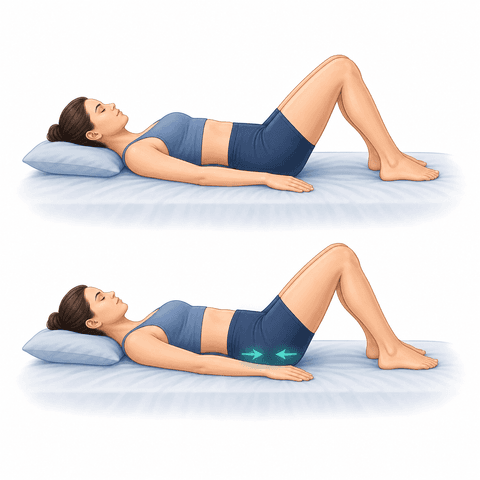
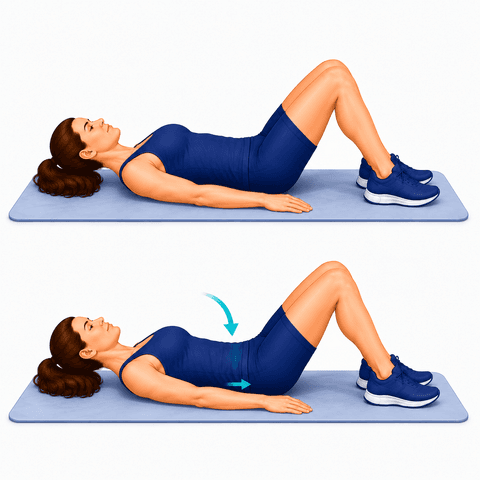
Pelvic Tilts

Gently mobilizes the low back and re-engages the core.
What it helps: Gently keeps the hips and low back moving and re-engages the core, so the whole midsection stays supple and supportive rather than stiff.
- Lie on your back, knees bent, feet flat.
- Slowly flatten your low back into the floor by tilting your pelvis and tightening your stomach.
- Hold briefly, then relax back to neutral.
Tips:
- Move slowly within a comfortable range.
- Pair the motion with your breathing.
Commonly done as 10–15 repetitions, 1–2 times a day.
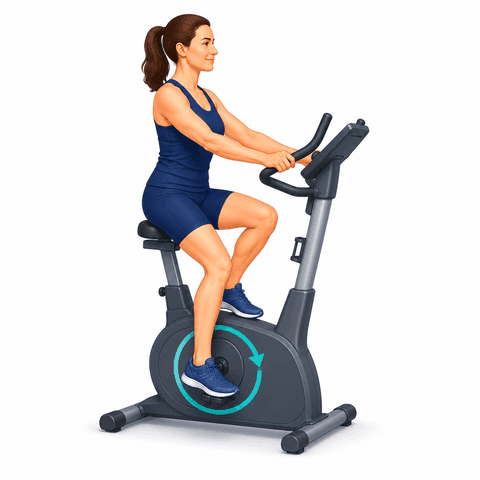
Stationary Bike

Builds motion and endurance with low impact.
What it helps: Keeps the joints moving and nourished while you build endurance — all with no pounding. One of the gentlest ways to stay active when a joint is sore.
- Set the seat so pedaling is comfortable.
- Pedal at an easy pace.
- Increase your time gradually.
Commonly done as directed.
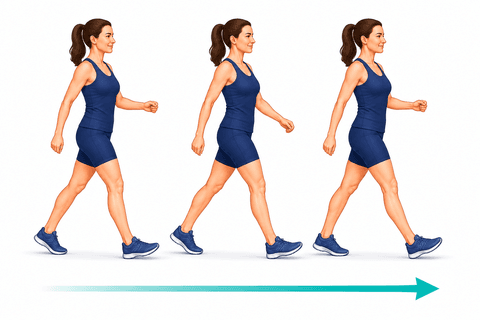
Walking Program

Short, frequent walks build endurance and confidence.
What it helps: Comfortable, frequent walking keeps the joints loose, builds your stamina, and rebuilds confidence on your feet. Little and often beats long and tiring.
- Take short walks at a comfortable pace.
- Increase your distance gradually as you feel able.
Tips:
- Use your assistive device as directed.
Commonly done throughout the day.
Phase 2
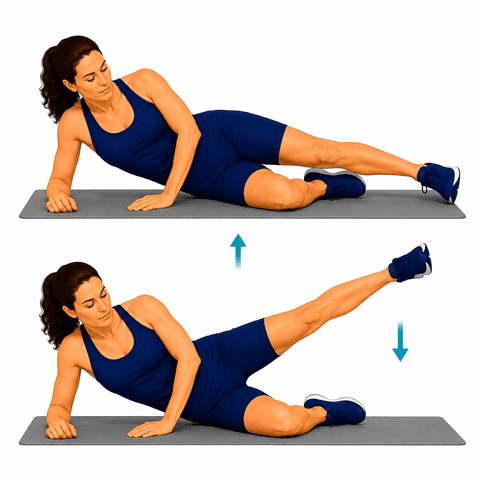
Side-Lying Hip Abduction

Strengthens the muscles on the side of the hip.
What it helps: Loads the side-hip muscles a step harder, building the strength that keeps your hip level and takes pressure off the joint on stairs and longer walks.
- Lie on your side with the bottom leg bent for support.
- Keep the top leg straight and raise it toward the ceiling.
- Hold briefly, then lower slowly.
Tips:
- Keep your toes pointing forward, not up.
Commonly done as 2-3 sets of 10-15, daily.
Standing Hip Abduction

Strengthens the muscles on the side of the hip.
What it helps: Strengthens the outer-hip muscles that hold you steady whenever you're on one leg — which is every step you take. Stronger here, steadier hip.
- Stand holding a counter for support.
- Lift your leg out to the side, keeping it straight.
- Lower slowly.
Tips:
- Keep your toes pointing forward.
Commonly done as 2-3 sets of 10-15, 1-2x daily.
Clamshells

Strengthens the hip and glute muscles that stabilize the pelvis and spine.
What it helps: Targets the muscles on the side of the hip that keep your pelvis level when you walk. Strong here, your hip tracks smoothly and shares load more evenly — steadier, more comfortable steps.
- Lie on your side, knees bent and stacked.
- Keeping feet together and pelvis still, lift the top knee like a clamshell opening.
- Lower slowly.
Tips:
- Do not let your pelvis roll back.
- Feel it in the side of the hip.
Commonly done as 2 sets of 12–15 each side, daily.
Bridges

Strengthens the glutes and core that support the low back.
What it helps: Builds the glutes and core together, giving your hips and low back a strong, stable base to move from — so the muscles do the work instead of the joints.
- Lie on your back, knees bent, feet flat.
- Brace your core and squeeze your glutes to lift your hips into a straight line.
- Lower slowly with control.
Tips:
- Keep your stomach gently braced — do not arch your back.
- Drive through the glutes, not the low back.
Commonly done as 2 sets of 10–15, daily.
Sit-to-Stand

Builds the strength and confidence to rise from a chair.
What it helps: Trains the exact strength you use to rise from a chair, a toilet, or a car. Stronger here means more independence and less of a struggle on tough days.
- Sit at the edge of a sturdy chair.
- Lean slightly forward and stand up.
- Lower yourself back down with control.
Tips:
- Use your arms for support as needed.
Commonly done as 2-3 sets of 8-10, once or twice a day.
Resistance Band Hip Strengthening

Builds hip strength in all directions with a band.
What it helps: Builds hip strength in every direction with light resistance, rounding out the support that keeps the joint steady.
- Anchor a resistance band and loop it around the surgical leg.
- Move the leg out to the side, backward, and forward against the band.
- Return slowly each time.
Tips:
- Keep your trunk steady and the motion controlled.
Commonly done as 2-3 sets of 10-15, daily.
Stationary Bike

Builds motion and endurance with low impact.
What it helps: Keeps the joints moving and nourished while you build endurance — all with no pounding. One of the gentlest ways to stay active when a joint is sore.
- Set the seat so pedaling is comfortable.
- Pedal at an easy pace.
- Increase your time gradually.
Commonly done as directed.
Phase 3
Bridges

Strengthens the glutes and core that support the low back.
What it helps: Builds the glutes and core together, giving your hips and low back a strong, stable base to move from — so the muscles do the work instead of the joints.
- Lie on your back, knees bent, feet flat.
- Brace your core and squeeze your glutes to lift your hips into a straight line.
- Lower slowly with control.
Tips:
- Keep your stomach gently braced — do not arch your back.
- Drive through the glutes, not the low back.
Commonly done as 2 sets of 10–15, daily.
Standing Hip Extension

Strengthens the muscles behind the hip.
What it helps: Strengthens the muscles behind the hip that power you forward with each step and help you stand tall — the engine of a strong, even stride.
- Stand holding a counter.
- Move your leg straight back without arching your back.
- Lower slowly.
Commonly done as 2-3 sets of 10-15, 1-2x daily.
Single-Leg Balance

Improves balance and stability.
What it helps: Trains your hip and leg to stay steady when all your weight is on one side — which is most of walking. Better balance means a surer, more confident step.
- Stand near a counter for safety.
- Lift one foot and balance on the other leg.
- Hold as able.
Commonly done daily.
Resistance Band Side-Stepping
Strengthens the hips and ankles with side-to-side stepping against a band.
What it helps: Strengthens the side-hip muscles through movement, the way you actually use them — great for stability and a level stride.
- Place a loop band around your legs (above the ankles or knees).
- Step sideways against the band's resistance, keeping tension.
- Step several times one way, then back.
Tips:
- Keep your steps controlled and your knees tracking forward.
Commonly done as 2-3 sets of 10 each way, several times a week.
Mini Squats

Builds leg strength through a comfortable range.
What it helps: Builds hip and leg strength through a comfortable range, so everyday moves — sitting, standing, bending — take less out of your joints.
- Stand holding a counter.
- Bend your knees a small amount, keeping them behind your toes.
- Return to standing.
Commonly done as 2-3 sets of 10, once or twice a day.
Leg Press

Builds leg strength with adjustable resistance.
What it helps: Builds solid leg and hip strength with resistance you can dial precisely to your comfort.
- Start with light resistance.
- Press through your whole foot.
- Return slowly.
Commonly done as 2-3 sets of 10-15, a few times a week.
Cycling

Low-impact endurance and motion.
What it helps: Low-impact endurance that keeps the joints moving smoothly while you build fitness — easy on the body, good for the long run.
Commonly done as able.
Phase 4
Progressive Strengthening

Gradually increases strength as you recover.
What it helps: Gradually raises the challenge as you get stronger, so your body keeps adapting and improving rather than plateauing.
Commonly done as directed.
Single-Leg Balance

Improves balance and stability.
What it helps: Trains your hip and leg to stay steady when all your weight is on one side — which is most of walking. Better balance means a surer, more confident step.
- Stand near a counter for safety.
- Lift one foot and balance on the other leg.
- Hold as able.
Commonly done daily.
Resistance Band Hip Strengthening

Builds hip and glute strength in every direction with a band.
What it helps: Strengthens the hip in every direction with a band, building the all-around support that keeps the joint stable as you move.
- Loop a band around your legs (above the knees or ankles).
- Perform side steps, hip abductions, or extensions against the band.
- Control the movement out and back.
Tips:
- Keep your core braced and trunk steady.
- Increase band resistance gradually.
Commonly done as 2 sets of 10–15, 3–4 times a week.
Cycling

Low-impact endurance and motion.
What it helps: Low-impact endurance that keeps the joints moving smoothly while you build fitness — easy on the body, good for the long run.
Commonly done as able.
Swimming

Low-impact, full-body conditioning.
What it helps: Full-body conditioning with the water carrying your weight, so your muscles work hard with almost no load on the joints.
Commonly done as able.
Low-Impact Conditioning
Easy on the joints, builds the endurance that speeds recovery.
What it helps: Keeps your heart and muscles working with activities that stay gentle on the joints — fitness without the pounding.
- Pick a comfortable activity: walking, stationary bike, cycling, elliptical, swimming, or rowing.
- Warm up 10-15 minutes before your exercises.
- Build toward 20-30 minutes as you're able.
Tips:
- Choose what you enjoy — consistency matters more than intensity.
Commonly done most days.
Phase 5
Walking Program

Short, frequent walks build endurance and confidence.
What it helps: Comfortable, frequent walking keeps the joints loose, builds your stamina, and rebuilds confidence on your feet. Little and often beats long and tiring.
- Take short walks at a comfortable pace.
- Increase your distance gradually as you feel able.
Tips:
- Use your assistive device as directed.
Commonly done throughout the day.
Cycling

Low-impact endurance and motion.
What it helps: Low-impact endurance that keeps the joints moving smoothly while you build fitness — easy on the body, good for the long run.
Commonly done as able.
Swimming

Low-impact, full-body conditioning.
What it helps: Full-body conditioning with the water carrying your weight, so your muscles work hard with almost no load on the joints.
Commonly done as able.
Progressive Strengthening

Gradually increases strength as you recover.
What it helps: Gradually raises the challenge as you get stronger, so your body keeps adapting and improving rather than plateauing.
Commonly done as directed.
Low-Impact Recreational Activities

Enjoyable activities that protect your joint.
What it helps: Getting back to the activities you enjoy in ways that are kind to your joints — the whole point of building this strength.
Commonly done as you like.
About Hip Avascular Necrosis
What the condition is, how it's usually managed, and what to expect — read the Hip Avascular Necrosis guide.
Recovery reading
Browse all exercise guides · Condition guides · Recovery education library
These are general exercise guides, not a personal prescription. The repetitions and frequency shown are what's commonly used — your own surgeon or therapist may advise something different, and their guidance comes first.