Place-and-Hold Finger Flexion
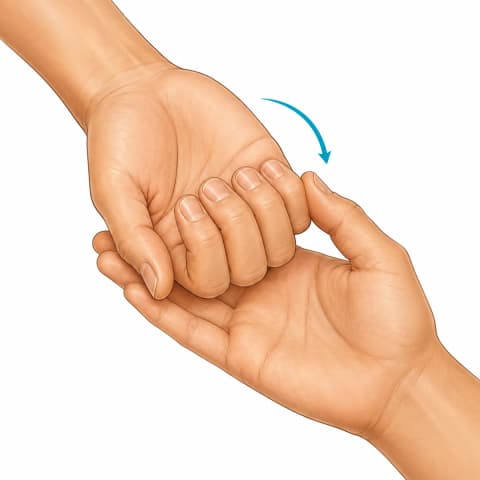
Your other hand bends the finger; the repaired tendon only holds it there.
What it helps
Produces movement of the repaired tendon inside its sheath at a small fraction of the force of actively making a fist. That glide is what stops the tendon sticking to the sheath around it, which is the main reason fingers stay stiff after a flexor tendon repair.
How to do it
- With the splint on and the wrist supported as instructed, use your other hand to gently bend the fingers into a loose fist.
- Once they are there, let go with the other hand and hold the position using the smallest effort that keeps the fingers in place.
- Hold for a few seconds, then use the other hand to guide the fingers back out straight.
- Never pull the fingers into a fist with their own muscles — the other hand does the bending, every time.
Tips
- The effort to hold should feel almost like nothing. If you are squeezing, you are loading the repair.
- This is the exercise that keeps the tendon gliding without pulling on the stitches. Doing it exactly as described is the difference between a working finger and a stiff one.
- Your hand therapist will set the number of repetitions and how often. Follow theirs over any general figure.
Commonly done as 1 sets of 5–10, every 1–2 hours while awake.
Where this appears in recovery
Place-and-Hold Finger Flexion is part of 2 recovery programs, typically at the place and hold (weeks 4–6) and active motion (weeks 6–8) stages. Each program shows how it fits alongside the other movements:
All exercise guides · Condition guides · Recovery education
These are general exercise guides, not a personal prescription. The repetitions and frequency shown are what's commonly used — your own surgeon or therapist may advise something different, and their guidance comes first.